You’ve got a great idea for an app and you want to build it with React. You also want to keep it in source control so that you’ve can easily back out breaking changes, manage code changes and access your code from anywhere. Finally you’d like to set up a continuous deploy pipeline so that you can quickly see your changes go live.
With create-react-app, git and Netlify this is a surprisingly simple process.
Dependencies
First of all let’s get everything we need installed. We’ll start with npm (Node Package Manager) which is what we’ll use to create the react app and install any packages we want along the way. Npm is installed alongside a node.js installation which can be obtained here. You can confirm your npm installation by running the following command:
npm -vwhich will print the current npm version.
Next we’ll need to install our source control provider - for this tutorial we’ll use git which can be installed from here. We’re going to store out code in the cloud using GitHub so we’ll need an account for this - you can sign up for one here.
Finally, we’ll be using Netlify to deploy our site, Netlify is a hosted service and requires you to have an account tied to your GitHub account. To do this go to the Netlify sign up page and click GitHub. Follow the instructions and enter your GitHub credentials when prompted to connect your account.
Getting Started
We have all our ducks in a line, let’s get started.
First, let’s create the React app, for this we’ll be using Facebook’s create-react-app CLI. To initialise a new project enter the following command.
npx create-react-app my-appNote:
npxcomes withnpm 5.2+so make sure you have the correct version.
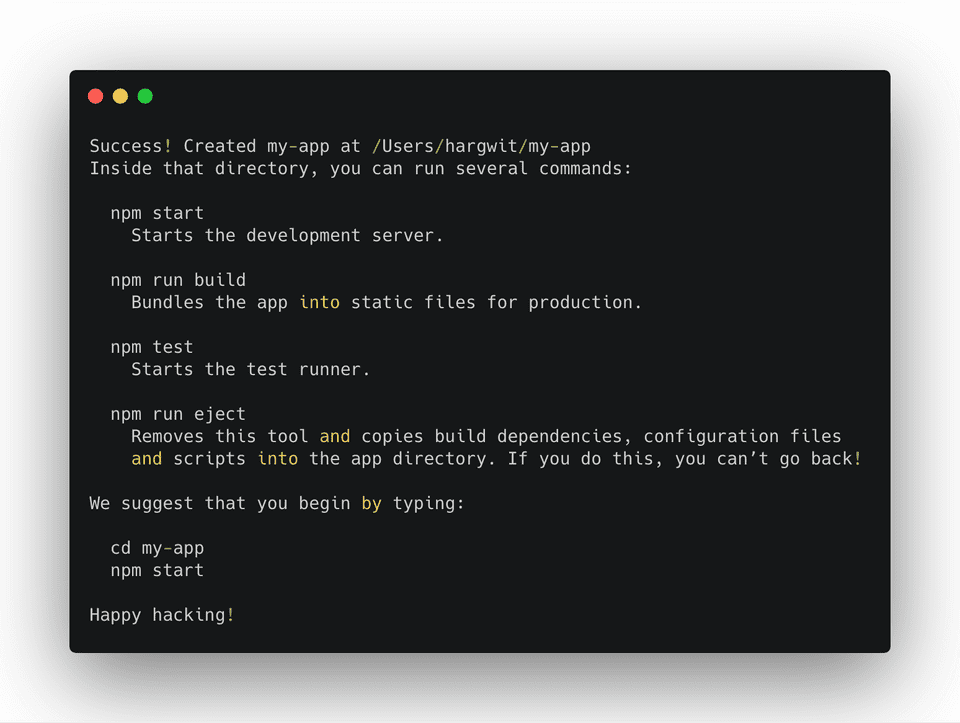
You should see the following message when this has finished creating your project:
This is telling us that if we want to develop our app locally we run the following commands:
cd my-app
npm start
Which have the following effects:
cd my-app- change directory into the root folder of the appnpm start- host the app at localhost:3000. As we develop our app we can go to this url to see the changes we’ve made.
Adding to Source Control
Now we want to connect our app to some hosted source control provider. This is so that if we break the app we can easily back out our changes and revert to a working version. It also makes it easier to collaborate with others and means that you can access your code from anywhere so long as we have an internet connection.
First let’s go to GitHub and create a new repository, call it my-app and hit
Create Repository - this is where the code will be stored. In the
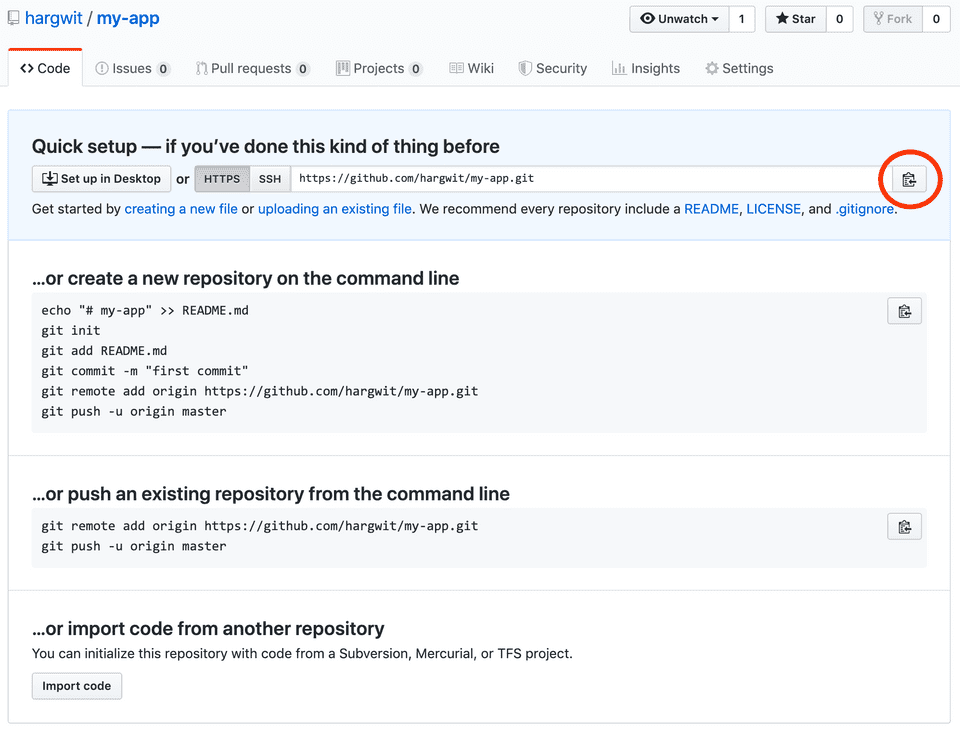
Quick setup section you’ll see a link that looks something like
https://github.com/gitname/my-app.git - click the copy to clipboard button
just to the right of this (circled in red below).
Next, return to your terminal and make sure you are in the root folder of your app. Now enter the following command:
git initwhich will initialise an empty local git repository in that folder. Now let’s
commit some code to the repository using the following commands.
git stage * .gitignore
git commit -m "Initial commit"
Great, now our initial code base is stored in local source control. Now we want to connect this to our remote repository on GitHub. Use the following command to link the two:
git remote add origin https://github.com/gitname/my-app.gitwhere the link is the one we copied to our clipboard on GitHub earlier.
Our local repository is now connected to the internet. Now we need to push our
earlier commits to the remote repository:
git push origin masterwhich tells git to push our commits to the master branch of the remote
origin we just added.
Going forward - whenever you make changes to the code base, you simply stage,
commit and push the code to bring the remote up to date.
Deploy to Netlify
We can view our app locally using the npm start command but now we want to
share it with the world. This used to be a fairly involved process where you
would have to hire a server and manually build and deploy your site with every
new update. With Netlify, this process got a lot easier. You can now simply
point Netlify at a GitHub repository and it will watch for changes to the master
branch and redeploy the app as and when it sees updates.
Login to your Netlify account, go to the sites tab and hit
New site from git. Next choose your provider - in our case it’s GitHub.
Netlify will give you a list of your repositories to choose from. You won’t be
able to see the repository for my-app until we have given Netlify permission
to see it. To do this, click the Configure the Netlify app on GitHub link at
the bottom of the page.
You can now select the my-app repository in the dropdown and hit Save which
should return you to Netlify. Now you should be able to see your repository in
the list, go ahead and click it and on the next page hit Deploy site. Netlify
will generate a random name for the project (which it uses for the url) and
start running deployment scripts.
When it has finished deploying (the url will go green like below), click the link - your site is now live.
You can easily change the name of the site by going to Site settings and
hitting Change site name. This will change the url of the site to
https://name.netlify.com (I changed my site name to hargwits-app so it is
hosted at https://hargwits-app.netlify.com).
Remember how I said earlier that Netlify watches for changes and redeploys the
site accordingly? Go ahead give it a go. Make a change to your app locally and
use the stage, commit and push commands to apply these changes to the
remote repository. Now give Netlify a view moments to redeploy and reload your
site page.
I ran through this tutorial myself, you can check our the code for it on my GitHub page and see the final result at https://hargwits-app.netlify.com.
Conclusion
As easy as that you now you have a cutting edge React app stored in hosted source control with a continuous delivery pipeline attached. You can now share your app with the world, collaborate on it with friends and build any number of awesome React apps.
Thanks for reading, I hope with was helpful, get building!


